Using images to represent ideas is one of the best ways to enhance PowerPoint presentations. A product label tag, for example, is great in designing your deck during a sales presentation. According to Entrepreneur, in such presentations, it’s essential to establish your identity and address your customers’ needs.
If ever you need a tag to back up your points and differentiate yourself from the competition, you can always search for custom images of these tags on the Internet and tweak them to your advantage.
Or better yet, create one that you can easily customize using the Shape functionality in PowerPoint. This tutorial will show you how to do it using the Shape and Text tools in PowerPoint 2010.
Drawing the Frame
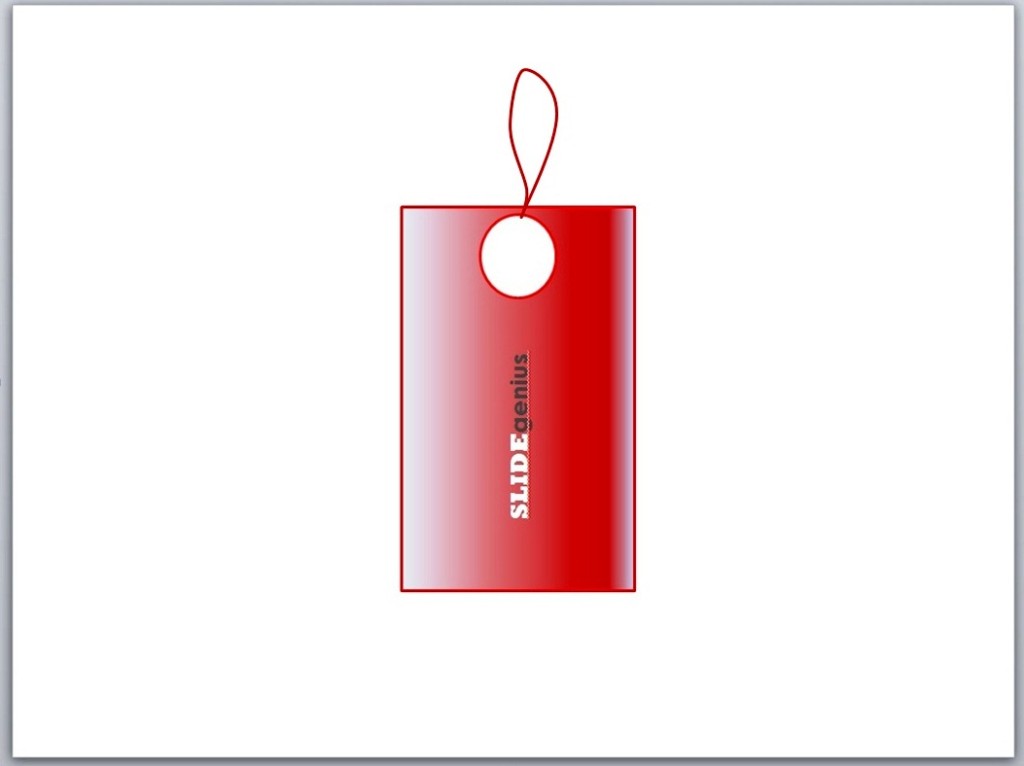
First, assuming that your PowerPoint is already open, create a new, blank slide. Then, draw the label using the Rectangular shape with a rounded border. You can find this in the Insert tab under Shapes.
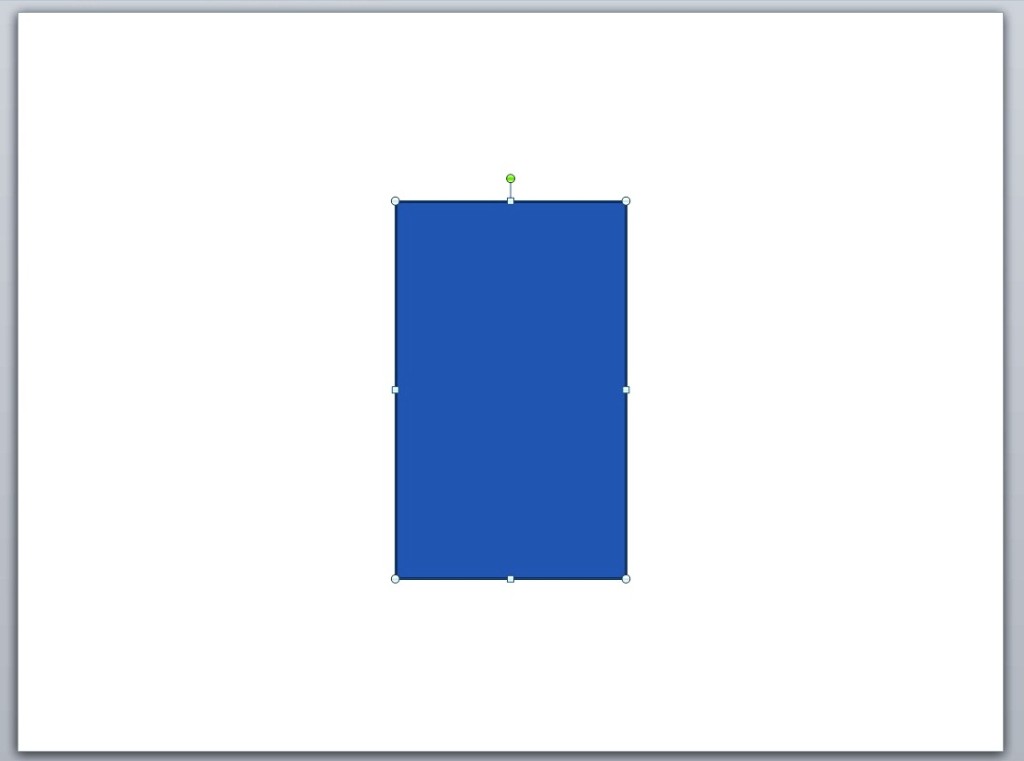
After this, select the Oval shape from the Shapes option to create a small circular shape. Put this near the top portion of the rectangle to serve as the label’s tag hole.
Filling with Color
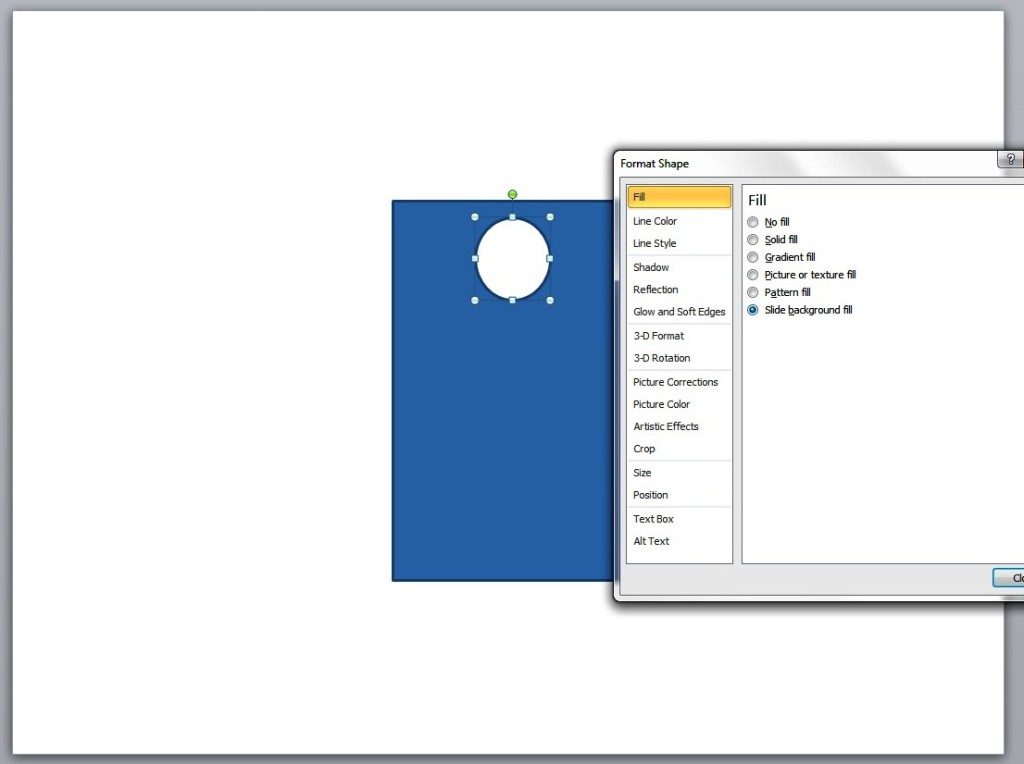
Fill the circle with the same color as that of the slide background. Do this by right-clicking on the shape and selecting the Format Shape option. Click Fill and then select Slide background fill.
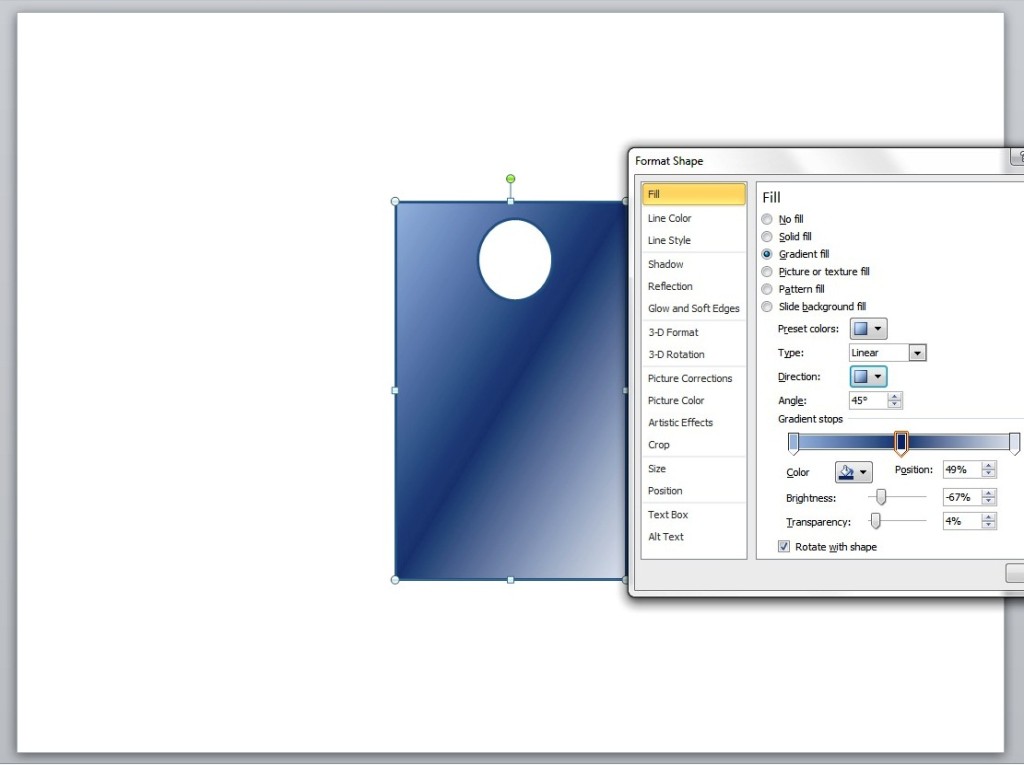
To give the label some depth, you may want to fill it with gradient color. To do this, click Fill from the Format Shape option and select Gradient fill. Depending on your preference, you may adjust the Gradient type, direction, color, brightness, and other qualities.
Final Details
To create the label’s string, select the curve line from the Shapes option. Draw a line from the small circle and then click twice until you reach the label’s border. You may manipulate the string to give it a more natural look. Simply click on it and drag any of the visible points accordingly.
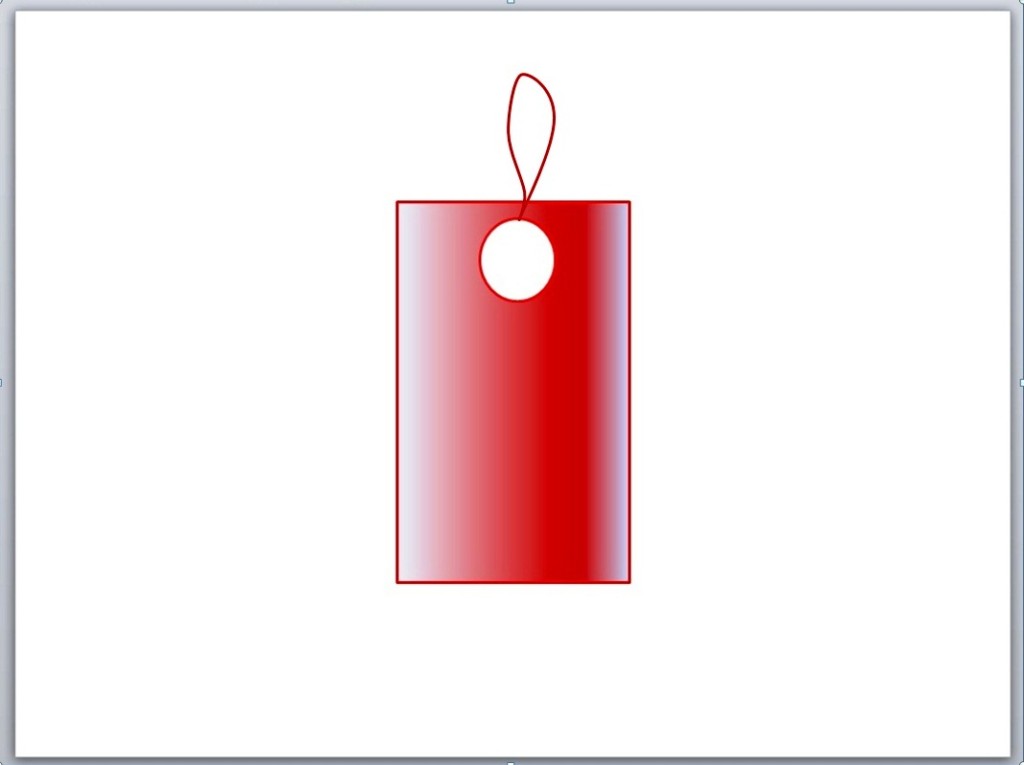
Lastly, you’ll have to group all the shapes in a single label. Select all the elements and then right click on the label. Next, click on Group (and the other Group option that will appear) and
Next, click on Group (and the other Group option that will appear) and Voila! You now have your very own product label tag that you can use for your sales presentation. For added impact, think about adding some text inside the tags.
Conclusion
An impressive deck is often eye-catching and unique, but more importantly, it should always be there to support you when you need to pitch to the crowd. Experiment with PowerPoint and add a tag to your slides. It’s simple and interesting. With just a few clicks using the Shapes tool, you’ll already have a tag-shaped image that you can spice up with text or gradients for depth.
Having trouble with your deck design? Our SlideGenius experts are always ready to help. Contact us today for a free quote!
Reference
“Making Sales Presentations.” Entrepreneur. February 24, 2013. Accessed May 15, 2014.
About SlideGenius
 SlideGenius.com is your business Power Point presentation expert. Based in San Diego, California, SlideGenius has helped more than 500 international clients enhance their presentations, including those of J.P. Morgan, Harley-Davidson, Pfizer, Verizon, and Reebok. Call us at 1.858.217.5144 and let SlideGenius help you with your presentation today!